|
2.
|
|
3.
|
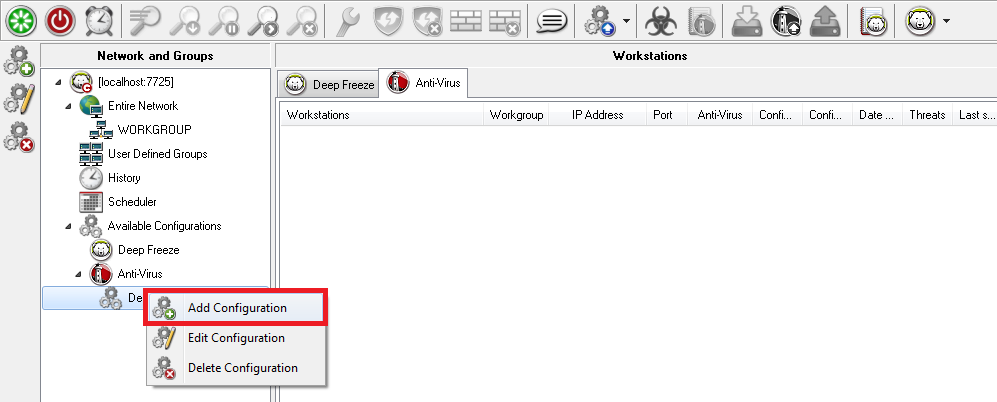
Right-click and select Create new configuration.
|
|
4.
|
Specify settings in the Workstation Settings node:
|
|
•
|
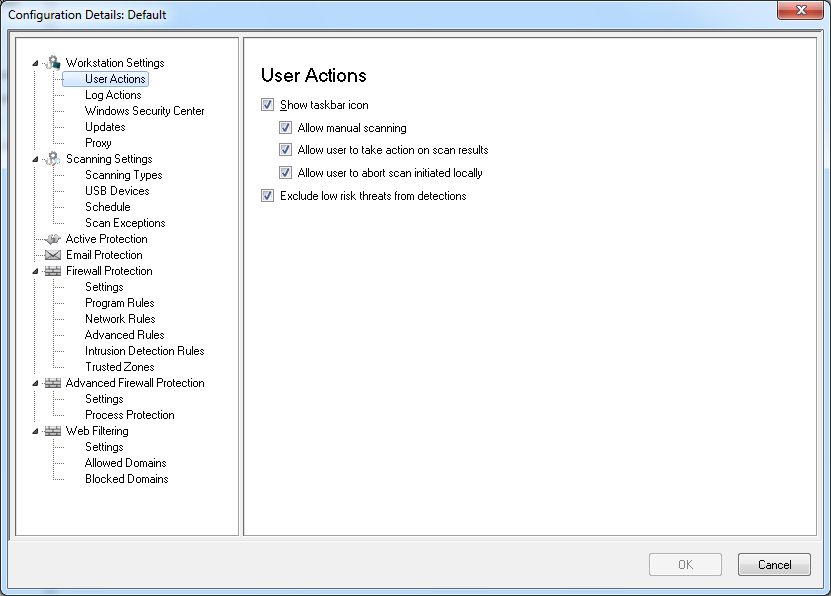
Workstation Settings node>User Actions pane
|
|
—
|
Show taskbar icon - select the check box to display Faronics Anti-Virus icon on the taskbar at the workstation(s). If this check box is not selected, Faronics Anti-Virus will be hidden to the user.
|
|
—
|
Allow manual scanning - select the check box to allow users to manually initiate Faronics Anti-Virus scanning at the workstation(s).
|
|
—
|
Allow user to take action on scan results - select the check box to allow the workstation user to take action on the scan results.
|
|
—
|
Allow user to abort a scan initiated locally- select the check box to allow users to abort the scan initiated locally at the workstation.
|
|
—
|
Exclude low risk threats from detections - select the check box to exclude low risk threats from detections. Low risk threats refer to threats that will not adversely affect a system (for example, cookies).
|
|
•
|
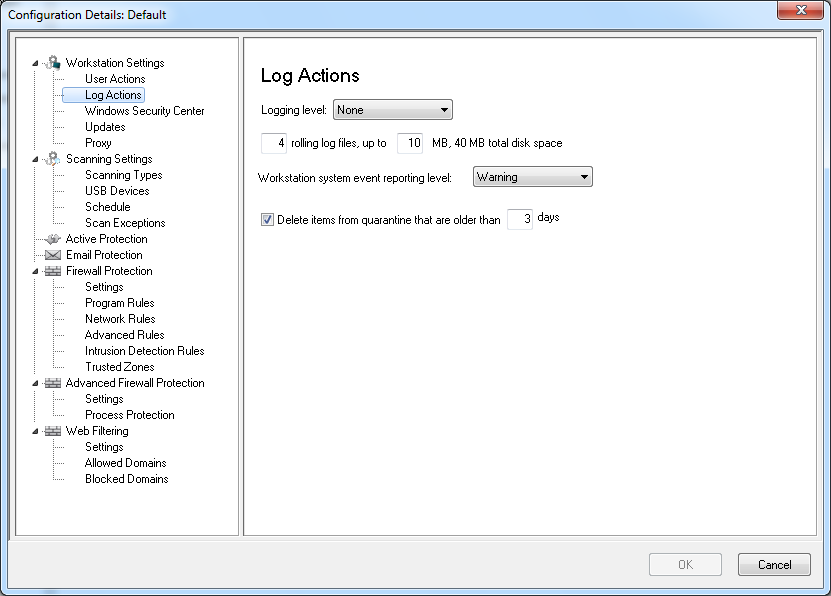
Workstation Settings node>Log Actions
|
|
—
|
Logging Level- select the logging level. Select None for no logging. Select Error to log the error message. Select Trace for trace. Select Verbose for detailed logging.
|
|
—
|
Number of logging files - specify the number of logging files. The logging information is stored in the files serially. For example, if there are 3 files A,B and C, Faronics Anti-Virus first writes the error logs to file A. Once file A is full, it starts writing to file B and finally file C. Once file C is full, the data in file A is erased and new logging data is written to it.
|
|
—
|
File size - Select the size of each file in MB.
|
|
—
|
Workstation system event report level - Select None, Error, Warning or Information.
|
|
—
|
Delete items from quarantine that are older than - specify the number of days to retain items in quarantine. The default is 3 days.
|
|
•
|
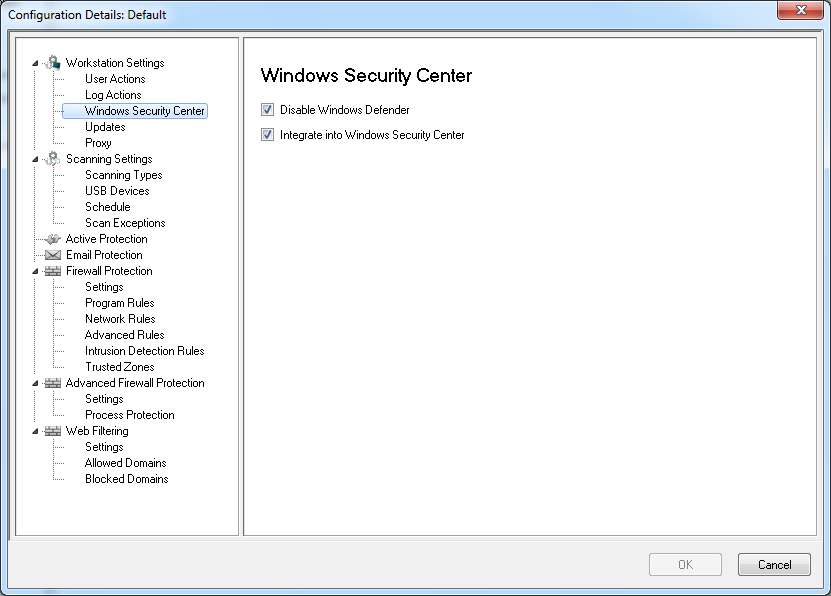
Workstation Settings node>Windows Security Center pane
|
|
—
|
Disable Windows Defender - select the check box to disable Windows Defender. This will avoid a possible conflict between Faronics Anti-Virus and Windows Defender. Running multiple Anti-Virus or Anti-Spyware programs may create a conflict since one program mistakes the other program to be a virus or a spyware. Also, running multiple Anti-Virus or Anti-Spyware programs might increase the workload on the processor and memory usage. However, if you want to keep running Windows Defender, you may choose not to disable it.
|
|
—
|
Integrate into Windows Security Center - select the check box to integrate Faronics Anti-Virus into the Windows Security Center. Windows Security Center will notify you via the System Tray if Faronics Anti-Virus is active or inactive.
|
|
•
|
|
—
|
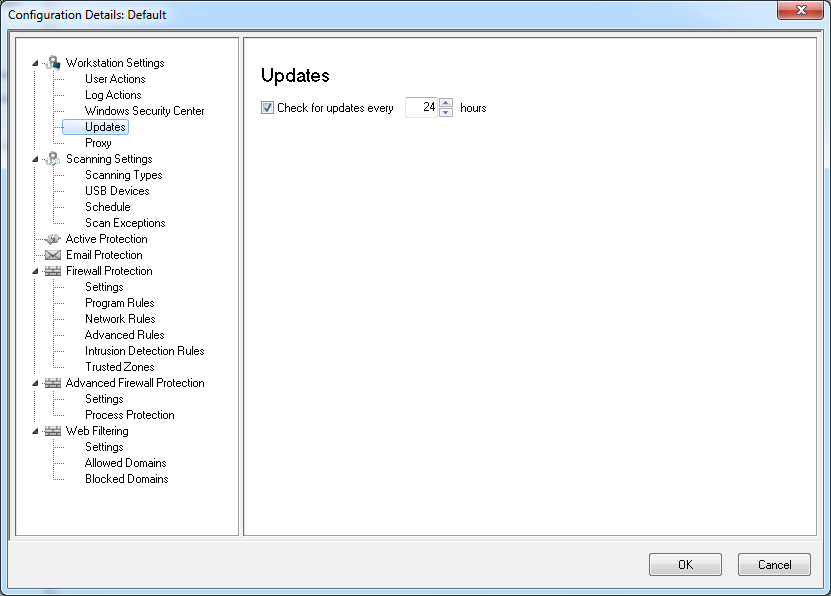
Check for Updates every x hours: select the check box to connect to the Updates Web Server and download Virus Definitions.
|
|
•
|
|
•
|
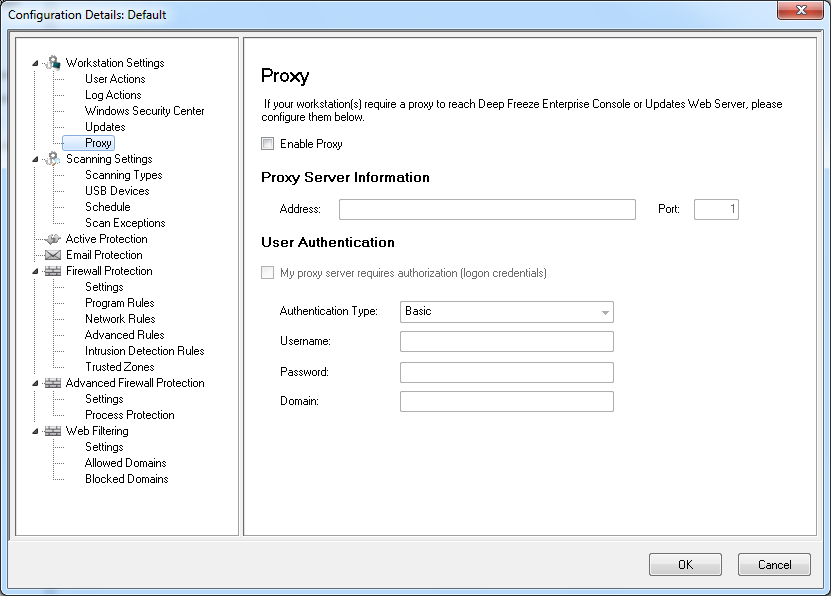
Enable Proxy - select the check box if the workstation(s) require a proxy to reach Updates Web Server. Specify the Address and Port.
|
|
•
|
My proxy server requires authorization (logon credentials) - if the server requires authentication, specify values for the following fields:
|
|
•
|
Authentication Type - select the authentication type.
|
|
—
|
Username - specify the username.
|
|
—
|
Password - specify the password.
|
|
—
|
Domain - specify the domain.
|
|
5.
|
Specify settings in the Scanning node:
|
|
•
|
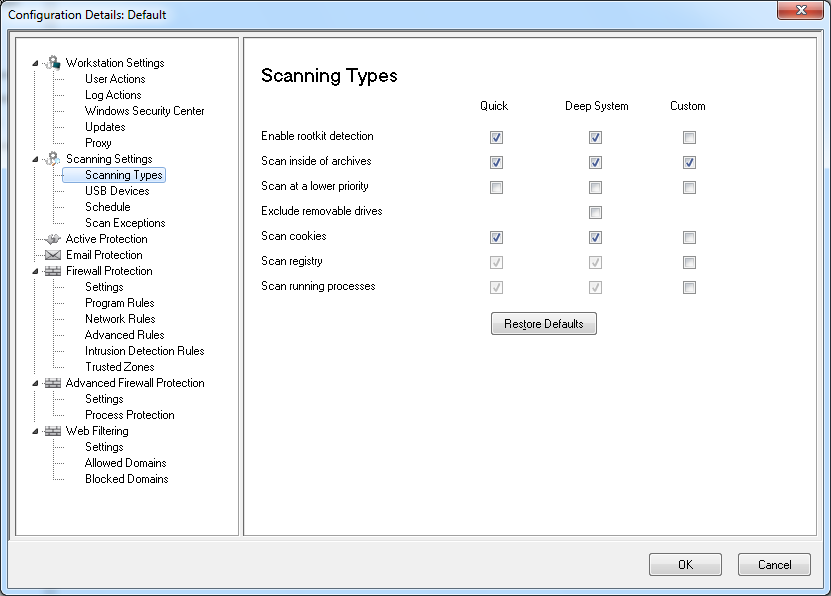
Scanning node>Scan Settings pane- Select the following for Quick scan, Deep System scan and Custom Scan:
 |
|
•
|
Quick Scan - scans the commonly affected areas of your computer. This is shorter in duration than the Deep System Scan. Quick Scan also uses less memory than the Deep System Scan.
|
|
•
|
Deep System Scan - performs a through scan of all areas of the computer. The time taken for the scan depends on the size of your hard drive.
|
|
•
|
Custom Scan - performs a scan based on the selections made in the Configuration Details dialog.
|
|
•
|
Enable rootkit detection - detects if the computer is infected with a rootkit.
|
|
•
|
Scan inside of archives - scans the contents of a zip file. Select for the scan to include archive files, such as .RAR and .ZIP files. When a .RAR file is found to contain an infected file, the .RAR file will be quarantined. If a .ZIP file is found to contain an infected file, the infected file is quarantined and replaced by a .TXT file with text indicating that it was infected and that it has been quarantined.
|
|
•
|
Scan at a lower priority - select to operate Faronics Anti-Virus at a lower priority, allowing you to continue working with other programs without decreased performance. It is good to select this option for scheduled scans that occur during times of regular use of the computer.
|
|
•
|
Exclude removable drives (e.g USB) - excludes the removable drives from the scan process. Any external hard disks, USB drives etc will not be scanned.
|
|
•
|
Scan cookies - scans the cookies saved on the workstation.
|
|
•
|
Scan the registry - scans the registry.
|
|
•
|
Scan running process - scans all running processes.
|
|
•
|
|
•
|
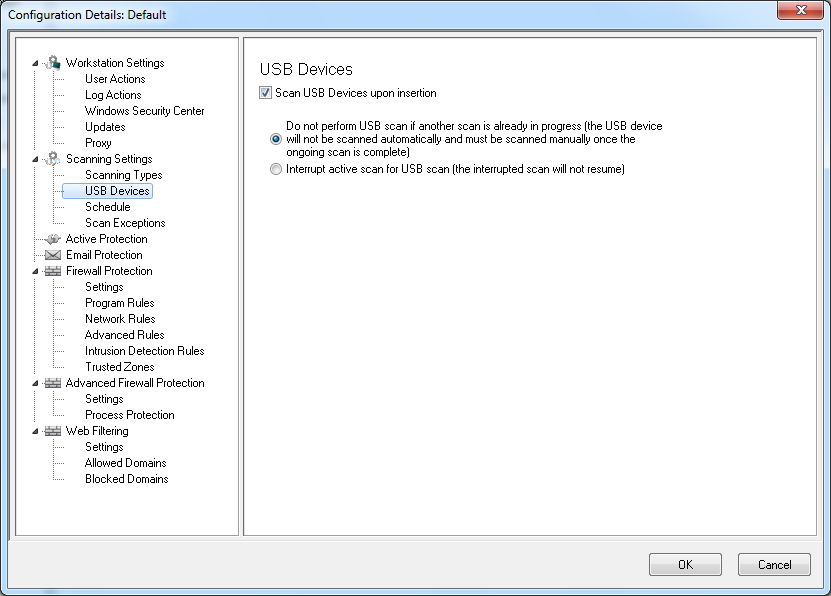
Scan USB drives upon insertion - select the check box to scan USB drives upon insertion and select one of the following options:
|
|
—
|
Do not perform USB scan if another scan is already in progress - select this option to ensure that an active scan is not interrupted when a USB drive is inserted. The USB drive must be manually scanned once the active scan is complete.
|
|
—
|
Interrupt active scan for USB scan - select this option to interrupt an active scan to scan the USB drive when it is inserted. Once the active scan is interrupted, it will not resume automatically and must be restarted manually.
|
|
If the Allow Manual Scanning check box is selected in the Workstation Settings tab>User Actions pane, the USB device is scanned automatically. If the Allow Manual Scanning check box is not selected, the USB device is not scanned automatically.
|
|
•
|
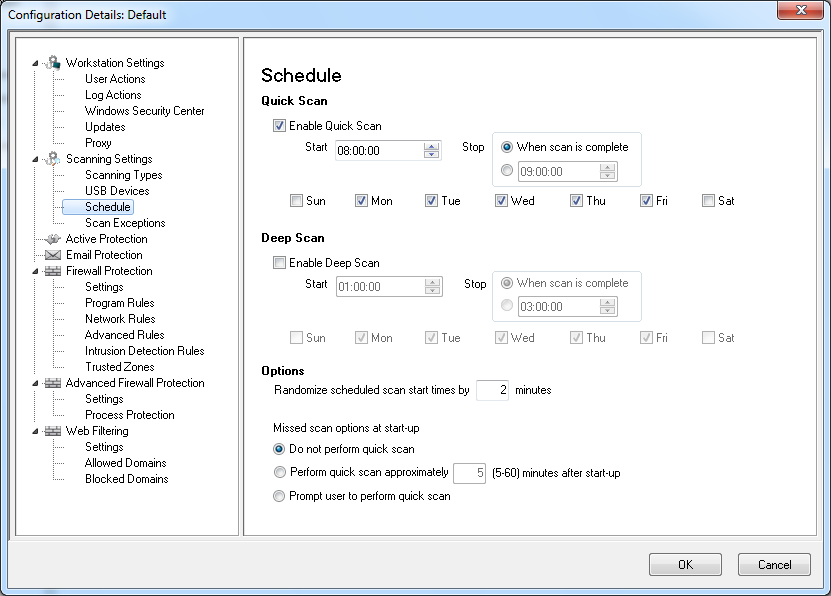
Scanning node>Schedule pane - Specify the following settings:
|
|
—
|
Enable Quick Scan - select the check box to enable Quick Scan.
|
|
—
|
Start - specify the start time.
|
|
—
|
Stop - specify the end time. The maximum duration between the Start time and Stop time is 23.59 hours. The scan ends if all the files are scanned before the Stop time. If the scan is not complete before the Stop time, it is aborted at the Stop time. Alternatively, select When scan is complete to ensure that scan is completed.
|
|
—
|
Days - select the days when the scheduled Quick Scan will take place.
|
|
—
|
Enable Deep scan- select the check box to enable Deep Scan.
|
|
—
|
Start - specify the start time.
|
|
—
|
Stop - specify the end time. The maximum duration between the Start time and Stop time is 23.59 hours. The scan ends if all the files are scanned before the Stop time. If the scan is not complete before the Stop time, it is aborted at the Stop time. Alternatively, select When scan is complete to ensure that scan is completed.
|
|
—
|
Days - select the days when the scheduled Deep Scan will take place.
|
|
—
|
Randomize scheduled scan start times by x minutes - specify the number of minutes. The scheduled scan start time is randomized to reduce the impact on network traffic.
|
Missed scan options at start-up: Select one of the following options on how a scan will be performed if the workstation was not ON during a scheduled scan:
|
—
|
Do not perform quick scan - select this option if you do not want to perform quick scan on startup.
|
|
—
|
Perform quick scan approximately x minutes after start-up - specify the number of minutes after start-up when Faronics Anti-Virus must perform a quick scan.
|
|
—
|
Prompt user to perform quick scan - select the option to prompt user to perform a quick scan.
|
|
6.
|
|
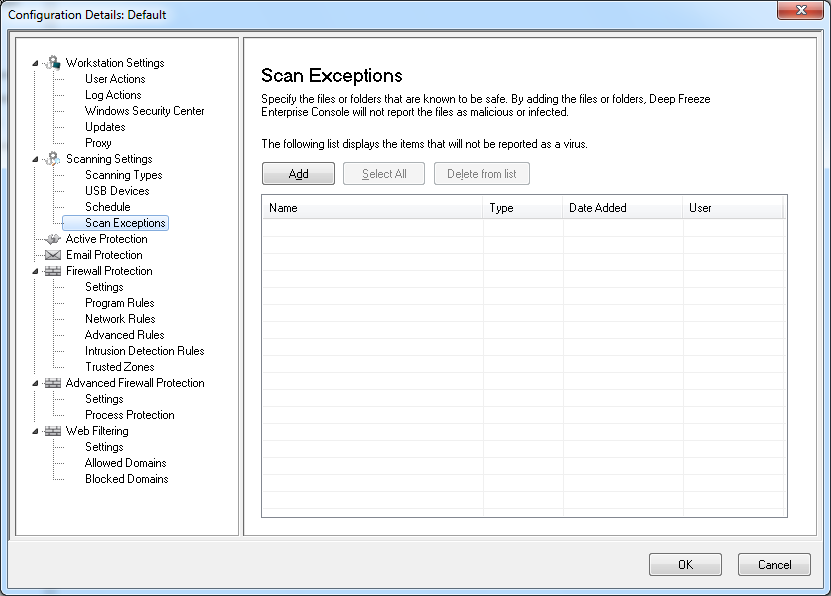
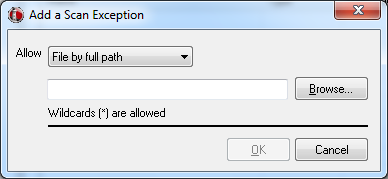
a.
|
Click Add.
|
|
b.
|
In the Add dialog, select File by full path, File by name only, Entire folder or Thread ID. Click Browse to select the file or folder and click OK.
|
|
c.
|
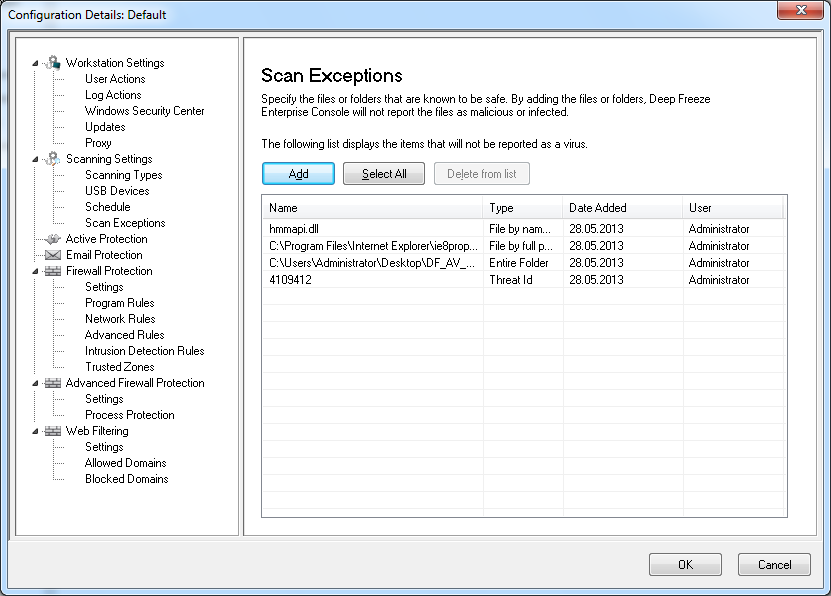
The File by full path is added to the Scan Exceptions pane.
|
|
7.
|
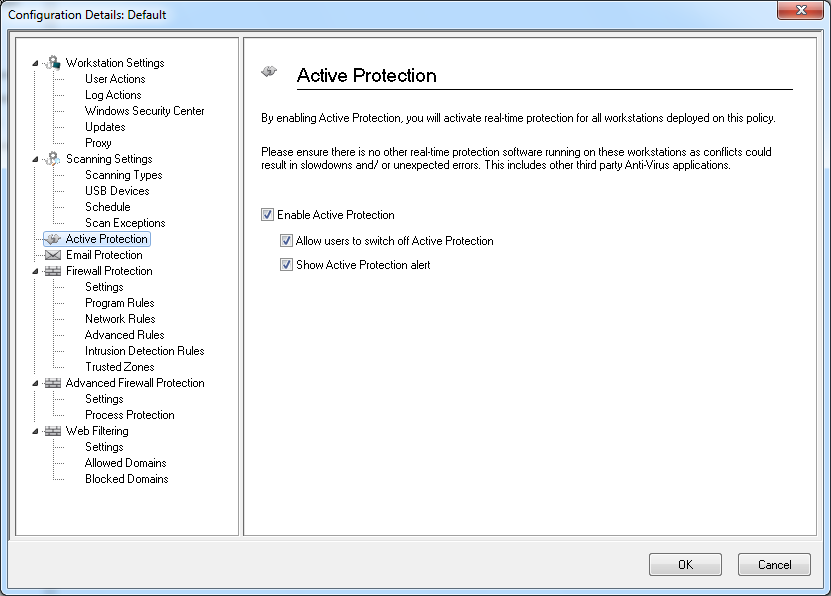
Specify settings in the Active Protection pane:
|
|
•
|
Enable Active Protection - select this option to enable real-time protection. Active Protection is the real-time scanning by Faronics Anti-Virus in the background without any impact on system performance. If there is a risk of real-time virus infection from the Internet, select this option.
|
|
•
|
Allow users to switch off Active Protection - select this option to allow users to switch off Active Protection. If users install or use software that might be mistaken from a virus (for example, running advanced Macros in Microsoft Office or complex batch files), select this option.
|
|
•
|
Show Active Protection alert - select this option to display an alert if a threat is detected during Active Protection. Do not select this check box if you do not want an alert to be displayed.
|
|
8.
|
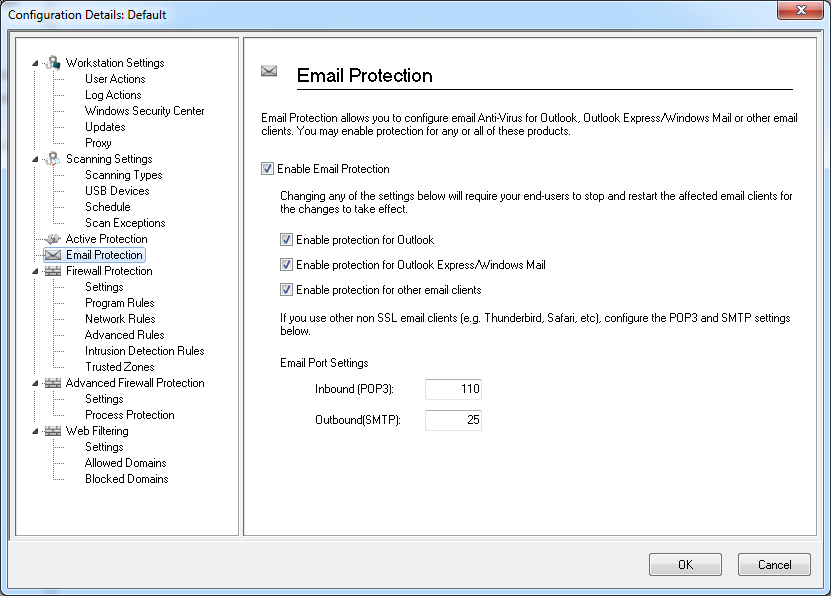
Specify settings in the Email Protection pane:
|
|
•
|
Enable Email Protection - select the check box to enable Email protection. The following options are enabled if Enable Email Protection is selected.
|
|
—
|
Enable protection for Outlook - select the check box to enable protection for Outlook. Faronics Anti-Virus scans all incoming and outgoing emails in Outlook.
|
|
—
|
Enable protection for Outlook Express/Windows Mail - select the check box to enable protection for Outlook Express/Windows Mail. Faronics Anti-Virus scans all incoming and outgoing emails in Outlook/Windows Mail.
|
|
—
|
Enable protection for other email clients - specify the Email Port Settings for Inbound (POP3) and Outbound (SMTP). Faronics Anti-Virus scans all emails in the Email programs using the Inbound and Outbound settings.
|
|
9.
|
Specify settings in the Firewall Protection node:
|
The Firewall Protection node provides bi-directional protection, protecting you from both incoming and outgoing traffic. You can create customized rules to protect your network. You can either Allow or Block the communication and also set the Firewall to Prompt.
|
•
|
Firewall node>Settings pane
|

|
—
|
Enable basic firewall protection - Select the check box to enable the firewall protection.
|
|
—
|
Allow users to disable firewall - This check box is enabled if the Enable basic firewall protection is selected. Selecting this option will allow users to disable the firewall at the workstation.
|
|
—
|
|
—
|
Log packets going to unopen ports - Select the check box to log data packets going to unopen ports. This data is useful to analyze the attempts to communicate with unopen ports in the network.
|
|
—
|
Log port scans - Select the check box to log all attempts at scanning ports over your network. The port scan data will be stored in the log file.
|
|
•
|
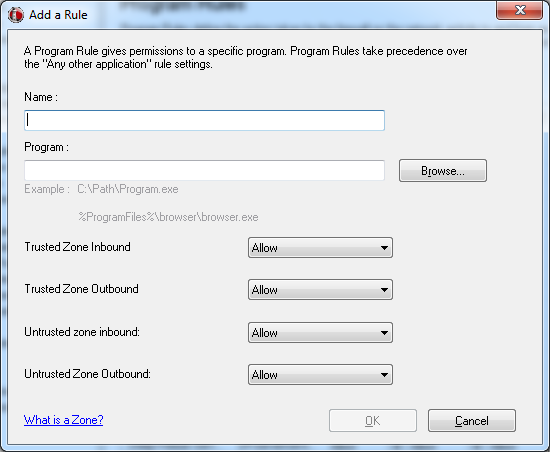
Firewall Protection node>Program Rules pane
|
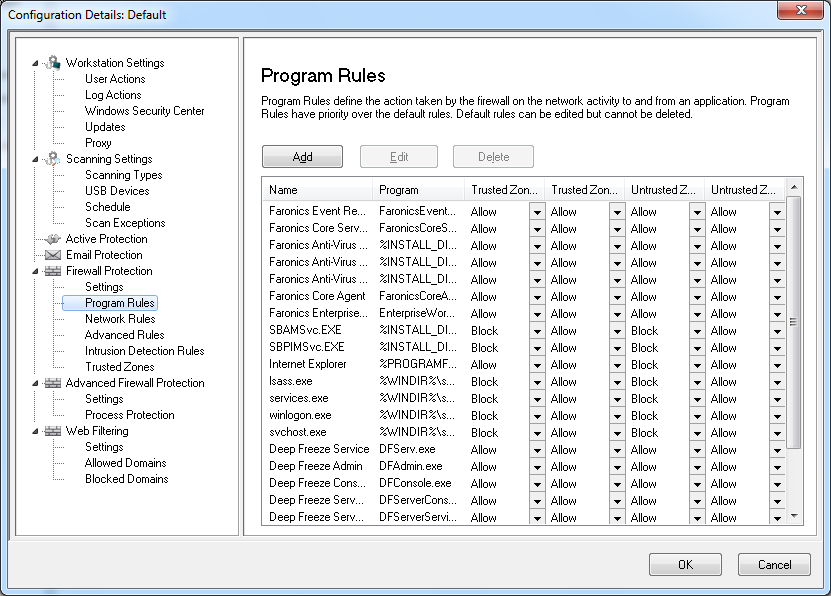
Click Add to add a new Program Rule. Specify or select the options and click OK. The following parameters are displayed:
|
—
|
Name - name of the rule.
|
|
—
|
Program - name of the program, including full path and extension.
|
|
—
|
|
—
|
|
—
|
|
—
|
|
•
|
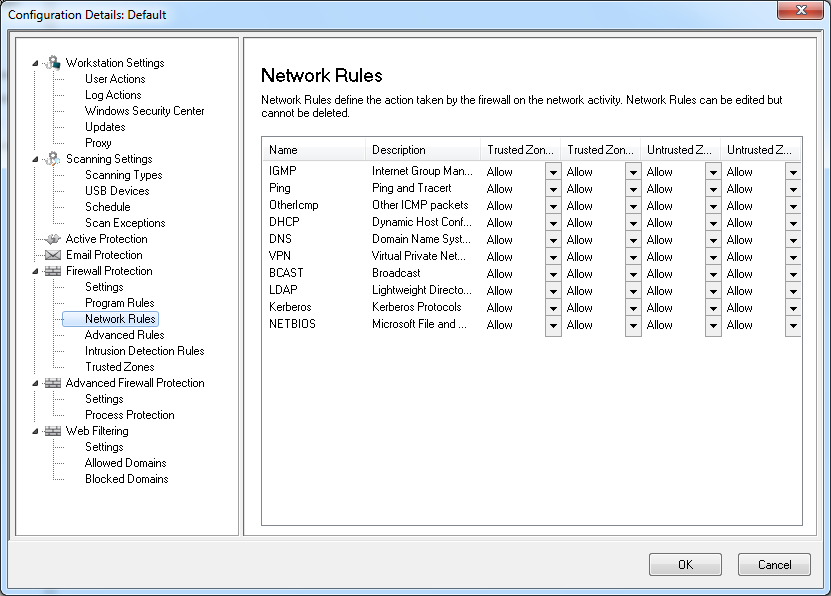
Firewall Protection node>Network Rule pane
|
|
—
|
Name - name of the protocol.
|
|
—
|
Description - description of the protocol.
|
|
—
|
|
—
|
|
—
|
|
—
|
|
•
|
Firewall Protection node> Advanced Rules pane
|
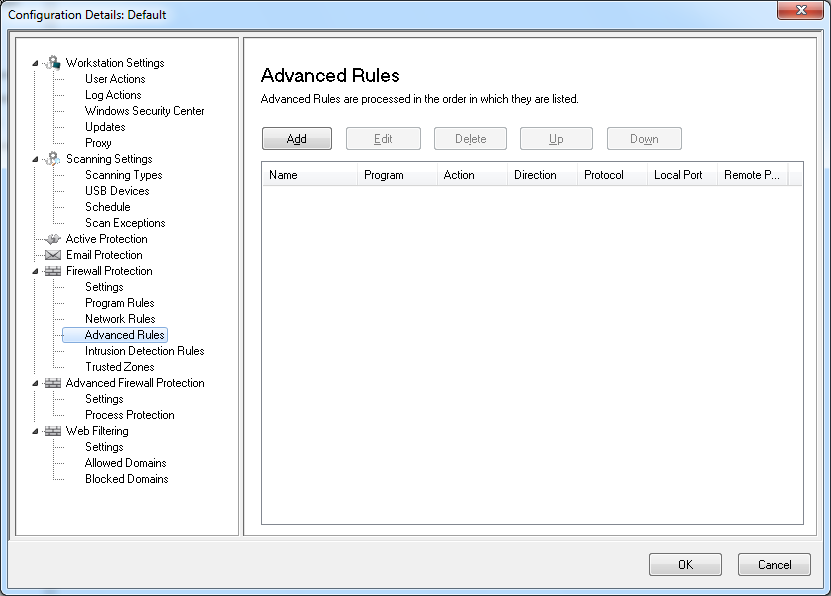
Click Add to add a new Advanced Rule. Specify or select the options and click OK. The following parameters are displayed in the Advanced Rules pane:
|
—
|
Name - name of the rule.
|
|
—
|
Program - name of the program and path.
|
|
—
|
Action - the action taken by the Firewall for communication from the specified application, port or protocol (Allow, Block or Prompt).
|
|
—
|
|
—
|
Protocol - the name of the protocol.
|
|
—
|
Local Port - details of the local port.
|
|
—
|
Remote Port - details of the remote port.
|
|
•
|
Firewall Protection node>Intrusion Detection Rules pane
|
The Intrusion Detection System (IDS) is used to allow or block network activity based on a defined Intrusion Detection Rule. Specify the action (Allow or Block) in the Intrusion Detection Rules pane for each rule that is categorized as High, Medium or Low priority on this screen. Click Edit to edit or Delete to delete a pre-existing rule.
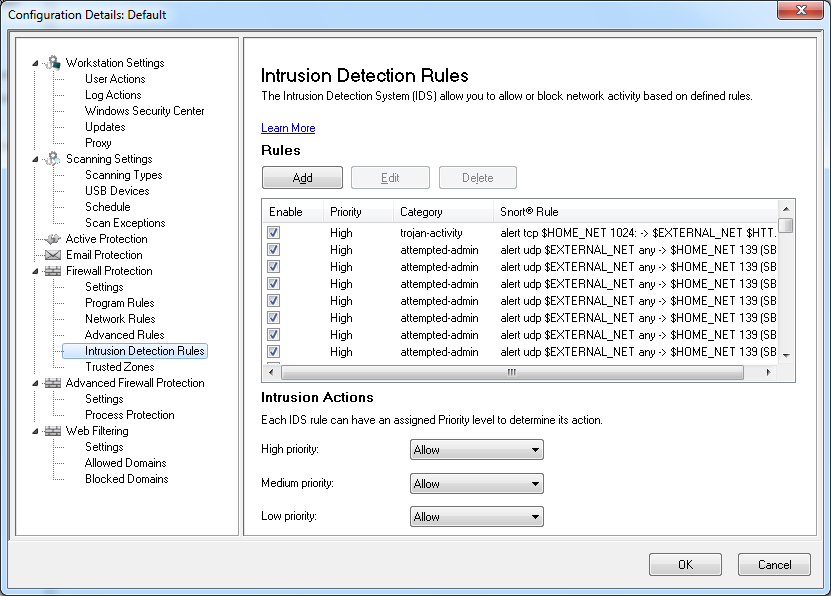
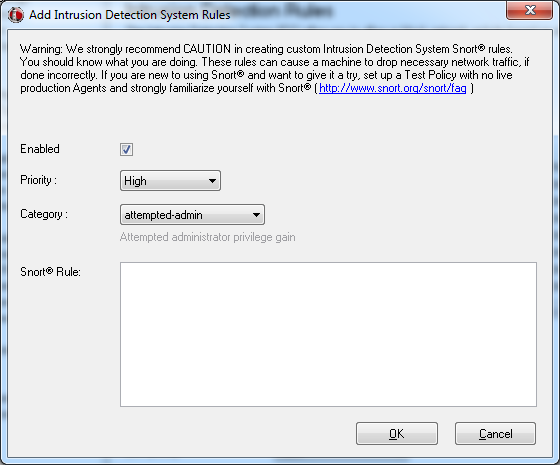
Click Add to add a new Intrusion Detection Rule. Specify or select the options and click OK. The following parameters are displayed when you click Add:
|
—
|
Enabled - select if this rule is to be enabled.
|
|
—
|
|
—
|
Category - select the category (such as bad-unknown, attempted-admin, attempted-dos, or attempted-recon).
|
|
—
|
Snort Rule- specify the snort rule. For more information on Snort rules, visit www.snort.org/snort/faq.
|
|
•
|
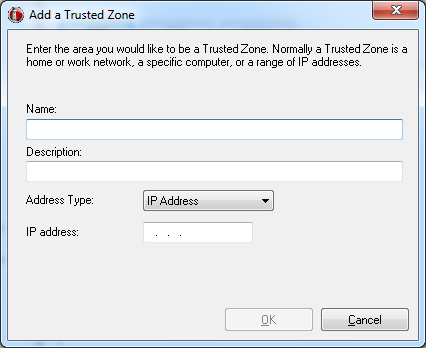
Firewall Protection node> Trusted Zones pane
|
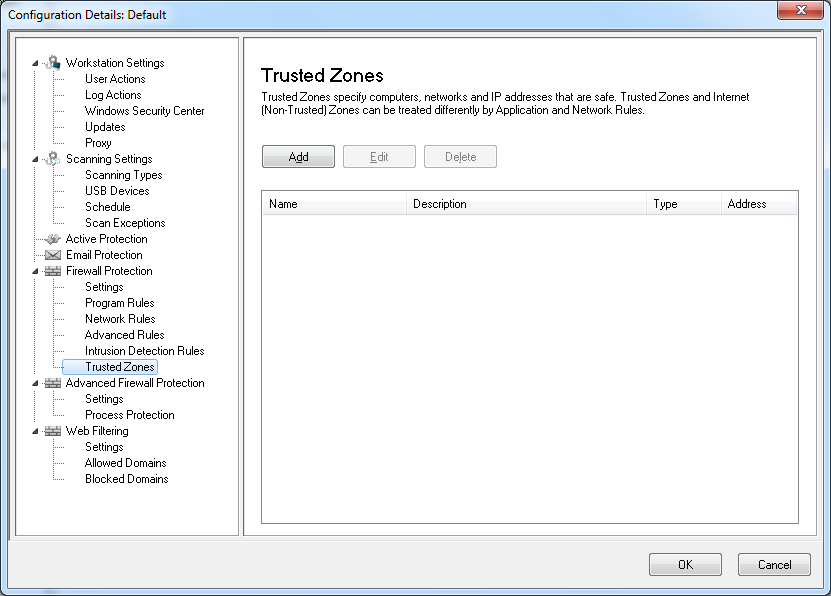 net (Non-Trusted) Zones can be treated differently by Program and Network Rules.
Click Add to add a new Trusted Zone. Specify or select the options and click OK. The following parameters are displayed:
|
—
|
Name - name of the Trusted Zone.
|
|
—
|
Description - description of the Trusted Zone.
|
|
—
|
|
•
|
Advanced Firewall Protection node> Settings pane
|
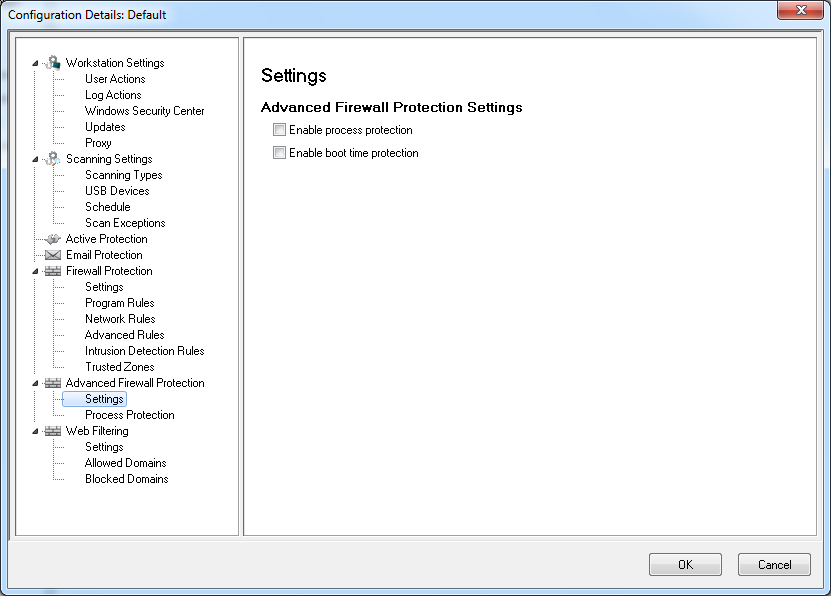
Select the options and click Apply. The following parameters are displayed:
|
—
|
Enable Process protection- select this option to enable process protection. This feature is used to set the action for unknown code injectors and to add your own allowed code injectors based on the settings in the Process Protection pane.
|
|
—
|
Enable boot time protection- select this option to enable boot time protection. Boot time protection protects your computer when it starts, blocking traffic from occurring before Windows has a chance to open.
|
|
•
|
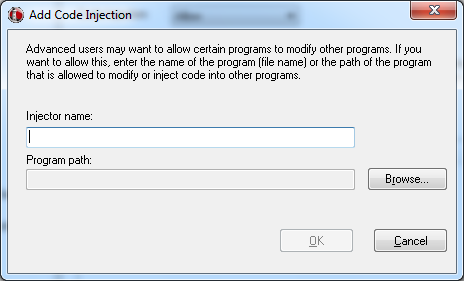
Firewall Protection node>Process Protection pane
|
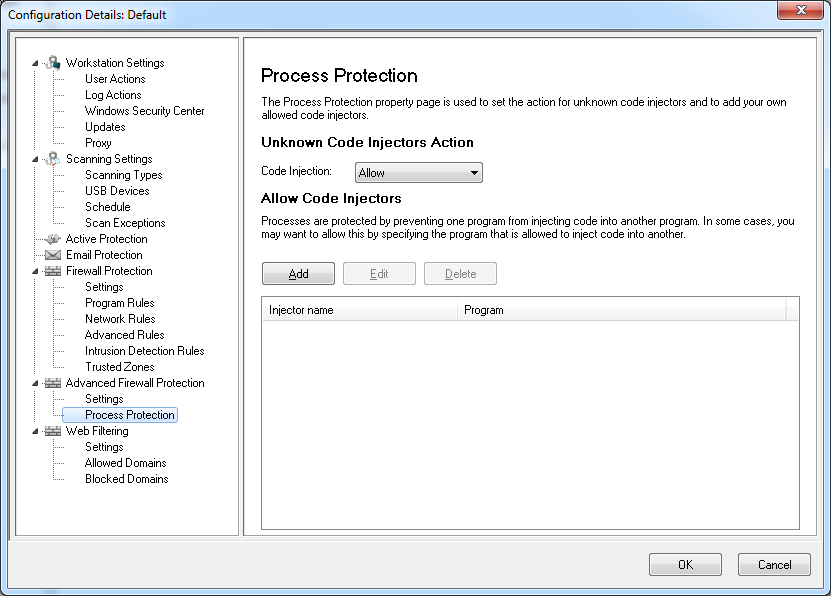
Click Add to add a new Code Injector. Specify or select the options and click OK. The following parameters are displayed:
|
—
|
Injector name- specify the name of the injector.
|
|
—
|
Program path- browse to select the program.
|
|
•
|
Web Filtering node> Settings pane
|

|
•
|
Select Enable Web Filtering to enable this feature.
|
|
•
|
Select Log when connections are blocked to ensure that the action taken by Faronics Anti-Virus is logged in the log file.
|
|
•
|
Web Filtering node>Allowed Domains pane
|
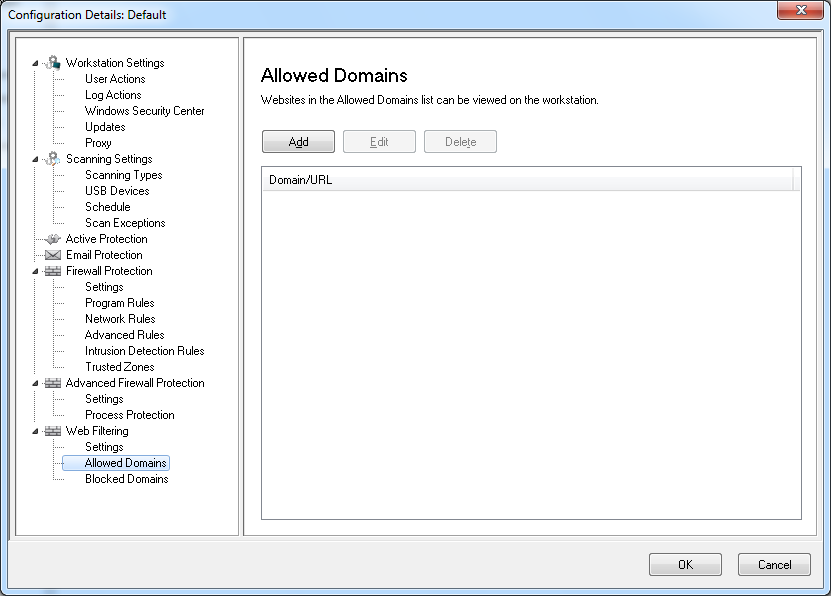
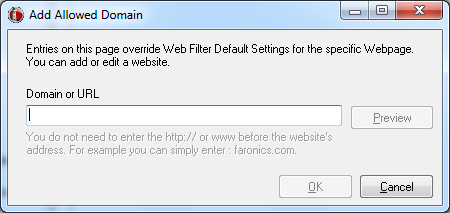
Click Add to add a new Allowed Domain. Specify or select the options and click OK. The following parameters are displayed:
|
•
|
|
•
|
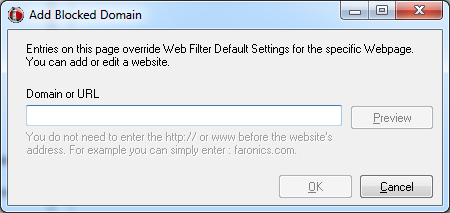
Web Filtering node>Blocked Domains pane
|
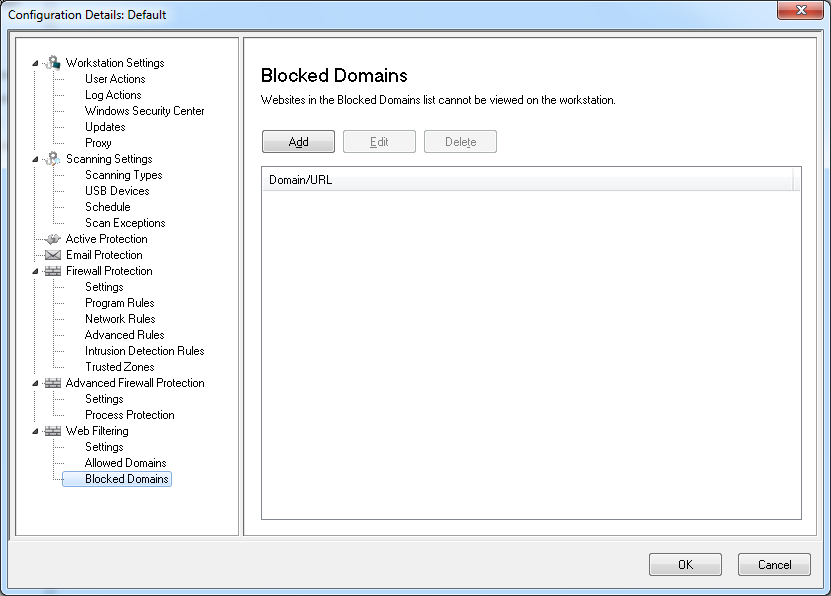
Click Add to add a new Blocked Domain. Specify or select the options and click OK. The following parameters are displayed:
|
•
|
|
12.
|
Click OK.
|