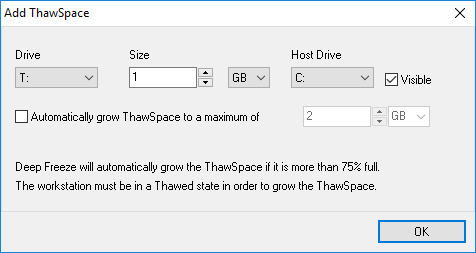
A ThawSpace can be set to automatically expand through the Automatically Grow option to prevent running out of space. The ThawSpace will automatically expand by 25% of its current size after reaching 25% free space or less. It will expand up to the maximum size defined in ThawSpace configuration.
1. Select the Drive Letter. The default letter is T:. However, it can be changed to any available letter. The next available letter is automatically used if the selected drive letter already exists on a computer when Deep Freeze is installed.
> When a Drive Letter is selected from the drop-down and used to create a ThawSpace, it is removed from the drop-down.
> When a ThawSpace is removed, the corresponding Drive Letter is added back to the drop-down.
>
2.
3. Enter the Size. This is the size of the ThawSpace. The maximum size is 1024 GB and the minimum size is 16 MB.
5. Select the Host Drive.
> The Host Drive is the drive where the ThawSpace is created.
>
6.
> If you select Visible, the drive will be visible in Windows Explorer.
> If you select Hidden, the drive will not be visible in Windows Explorer.
7. Check the Automatically grow ThawSpace to a maximum checkbox and configure the maximum size of the ThawSpace.
8. Click Add to add the ThawSpace.To remove a ThawSpace, select the ThawSpace and click Remove. The ThawSpace is removed and the drive letter is now added back to the Drive Letter drop-down. Click Remove All to remove all the ThawSpaces.
In the above screen, a ThawSpace of 16 MB is created on the Host Drive C: and the ThawSpace is designated with the drive letter T:. The ThawSpace T: is set to Visible and can be accessed via the Windows Explorer.